
Your cart is currently empty!
3D Printing Library
NOTE: Designs for milling do not need offset screw channels. Before milling, redesign with the standard Badger Screw Library (either straight or angled) to ensure proper fit with the Badger Screw.
- Download the Badger 3D Printing Exocad Library and Calibration Block .stl. Then unzip the files.
2. Next, load the Calibration Block into your chosen slicing software with the side labeled “FLAT” on the build plate. The procedure is outlined in the video below:
3. Important: Thoroughly clean and cure the Calibration Block.
4. Insert a Badger Screw into each of the access holes and tighten onto an analog.
The negative numbers represent holes that are smaller than nominal, the positive numbers represent holes that are larger. Watch the walkthrough below for further instructions:
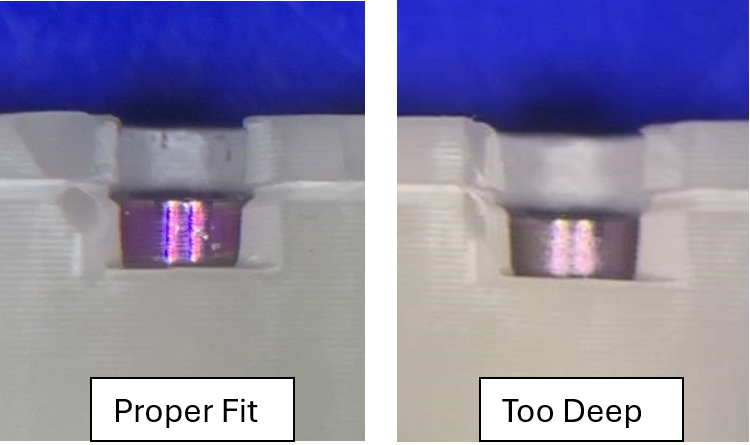
When the top edge of the head of the Badger Screw aligns with the indication line on the Calibration Block, that is the screw hole that is properly calibrated for your printer and resin.
Each hole is marked with a numerical code. Record the code that the screw fits best in.
5. Now that you have acquired your printing code. Place the unzipped Badger 3D Printing Exocad Library in the “implant” folder in your Exocad file location. The path to this folder is shown below:
- Note: Exocad file location may vary, however, the file structure should be the same.

6. When designing in Exocad, select the MUA/Badger Screw interface that correlates to the code you gathered for the most accurate fit.
7. Fill out the 3D Printing Survey below to help us ensure our libraries are accommodating of all 3D printers and resins.